Friday, April 20, 2018

INDOORS 50


Taking a short break from the coffee lounge, here is my bedroom vase. Still in situ are two stems of the carnations I was given as a thank you for my services and care given to Betty, added to these are daffodils from the garden.


Back to the coffee lounge...and this is the decor wall coming along fine. 
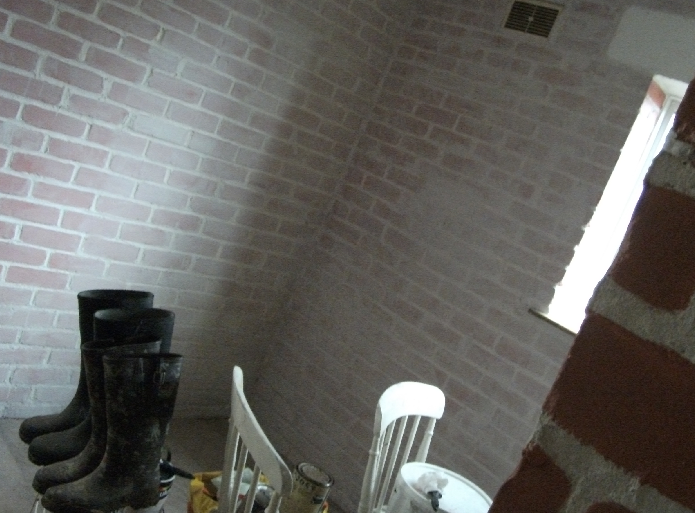
In the next shot you can see - well, other than me - the untouched tools alcove and brown cupboard, along with some completed Egyptian Cotton and Timeless white - walls/ceiling.


The window looks small - as it is - but is painted other than the over-hang. The next shot shows the finished wall and the one after the finished decor-wall.


We are now at the second weekend, mid-April. On the Saturday, I tried to fit in as much as I could - and that included turning out the pantry!


Above you can see the back door - awaiting undercoat and top coat in similar shade of white, prior to adding some color to the rest of the door. Also seeable is the 'mineral mist' blue I used in my bedroom, also adorning the 3 over door sections of the room.

Sunday, April 15, 2018

INDOORS 49


Here you can see that I also began to paint the back door. This is also going to be a decorative artsy display - not plain painting. I have 7 cans of gloss paint to use up and here we see the first can being used. Below, you can see how I spent the final Saturday of March - undercoating, waiting 5 hours, then top coating the coffee lounge ceiling. This is the undercoat almost done.


Here you can see the fake-glass panel - I am of two minds whether to paint over it or not - it might make the room darker, but prettier...

Alas, you can now see that this took me far longer than expected - one undercoat was nowhere near enough to cover BRIGHT pink brickery. It was going to take 2 undercoats and two topcoats...


I progressed - painting, painting, painting.... and almost finished the decor wall - but using the pale pink for the extra undercoats meant using the ceiling white paint on the decor wall instead, as I had more of that spare.


my final picture for today shows the walls after 2 undercoats....

Sunday, April 8, 2018

INDOORS 48


Liz suggested that I use the vacuum rather than a wet cloth after observations on my slow progress with cleaning down the walls. Here I am ready to vacuum the ceiling and walls and wipe down the mucky bits in the coffee lounge.


Before I could turn to painting however, I had a polyfilling job to be done. A lot of the brick wall that had been painted over was in tact - but in many places a little pre-paint attendance was needed. Cracks in the joints and surface cracks and holes where mortar had dropped were my three main tasks with the polyfilla tube.


I left the cleaning alcove and chunks of brick that were gone from its surrounds and a half tube polyfilla for another time. As March drew to a close, and the rains had wet the ground earlier in the day, I tossed on the CD of the musical Liz and I had gone to see recently and began...

...to fill in my 'blank canvas' of pink and white decor while sipping a peppermint tea. The wall above was to be filled with odds and ends of paint left over from the rest of the house decorating, of which I have now done everything except the bathroom and this coffee lounge.

I started by seeing how much of each color I had left - by shaking the tins and weighing them in my hands. I then began to apply the undercoat of beige, green stuff, and yellow which adorn my hallways and stairs, my sons bedroom, and the toilet.


I then proceeded to apply the mauvey-purple that covers the upper rim and ceiling of my spare room, before calling it a day and waiting for paint to dry. The idea being to recover each color and then fill in the rest of the wall with the paler pinky-mauve I used in the lower part of the spare room, paint the ceiling with left over kitchen ceiling paint, the rest of the walls with the full tin of paint Liz gave me that is the same color as her hallway, and gloss the door in a mosaic design with left over gloss paints. If there is any wall paint left, It will go in the cleaning alcove in stripes after that area is cleaned and polyfilled last of all.

Saturday, April 7, 2018

OUTDOORS 34


By 5.20pm, the poly tunnel was covered successfully. Around the outside, Liz had insisted we clear the ground further than I had thought necessary - leaving me some dirt/roots to turn into a pleasant hedge along the fence and a small growing area beside the poly tunnel.


We had 3 jobs left to do - some other day. One is to place 2-3 wooden batons across the poly at the rear to secure it; two is to refasten the latch; three to reverse the poly on one door post at the front.


A couple of days later, and we took a trip in the snow to the garden center for me to stock up on compost. Liz insisted it would be better for me to tip out what was in the tubs and pots already and start over.


I went back to the plot to see if there was enough snow to build 2-3 1-foot snowmen - but alas, the wind had taken most of the snow away. Hopefully it also killed off some of my weeds in my weed pile, though!

The poly tunnel now has the batons on the rear - well - 3 of them, although Liz thinks we should add a fourth. I was going to spend a half hour fixing the door latch in place - but the dry weather caught my mind and lead it elsewhere.


The side of the poly tunnel was now cleared and Liz had suggested I move the bush from sticking out near the door to the edge - which I agreed would be beneficial, and plans to make a sort of border along the fence began.

The above photo shows my start - I moved not only that bush, but a couple of clumps of bluebells, 3 pieces of fuchsia, a cut off shrub like thing, a bulb that may be garlic and may be a flower, a seedum, and 2 of the purple spotted leaf plants - then replaced the old palm tree trunk....

I have gotten as far as the broken plant pot.