Sunday, April 3, 2016

GARDEN GLIMPSES 34


I soon had the main structure assembled successfully as you can see in the above picture. The next tasks were to sip some more of my wine and cover the framework with the plastic cover. I then had to locate green garden wire and cutting pliers...


...so as to secure the hooks to the wall-mounted wire stuff. My father once had a similar patio greenhouse, but it blew over frequently and so these attachments were necessary.


I then noticed something - my finger was red. At some stage, possibly the splitting side piece or possibly when wiring to the wall frame, I had scratched a cut near the nail...


After washing my finger and band-aiding it with savlon, I could peruse my finished product - and drink my wine up.

Thursday, March 24, 2016

SPRING CLEANING 37


Taking a look at the base of the old shower curtain, I think you can see why I chose to buy a new one with my bathroom voucher! You will soon be able to see my recycling in action, as I am going to use the former curtain as a painting sheet!

The new curtain is much lighter and cleaner and goes well with my new cabinet...


Now onto mid-March, when I turned my cold into a sinus infection and also had a tooth extracted - so did not do much for a couple of days, or feel like spending time doing heavy work at the plot. I didn't want to be ultra lazy either, so after 1.5 days lazyishness, I compensated with some odd jobs round the yard and house.


The first little job was to repot my geraniums. My father once took cuttings from his and threw away some tiny bits he didn't think were worth growing. I felt that they were worth growing, so potted them up. All three of mine survived and grew into happy healthy plants that not only outlasted my fathers, but out grew them too. They grew so big, I had to repot them a second time 3-4 years after the cuttings were first popped onto my windowsill.


They were now in larger pots and I no longer wanted my windowsill cluttered, albeit with plants. I decided to pop them in the spare room at first, as you can tell by these photos.


Sunday, March 20, 2016

GARDEN GLIMPSES 33


Here is an update on the garden - or rather the poly tunnel. Here you can see my pak choi, which I am letting go to seed along with a radish for similar purpose. Next is the tray of pots - including a cabbage, brussels sprout, and 4 sweet peas coming up.

In the next shot, you can see my bags of leaves alongside my potato buckets and garlic pots. Yes, there is rather a lot of growth from the spuds for March - but...the spuds were sprouting in the kitchen and I didn't fancy eating them when they wanted to grow so I tossed a couple into these spare buckets and....


OK, now it is on to the work I have done recently. Here is a picture of the patio once I had cut the ivy/brambles back. I also moved the chairs and pots... The reason being that I intended to erect the patio greenhouse. The items in the poly tunnel were beginning to come along well enough to be shifted onwards to allow for more seeds to be sown in the tunnel.


I therefore ripped the dead ivy/brambles from the wall framework and began. I emptied the box and poured the wine. All the pieces were there, so I began. the instruction sheet was clear enough in the diagram for me to see which pieces fitted where - and I had once helped my father build a similar model anyway, so I got to work on the assembly.


Everything seemed to be fitting together well - except I had ONE side bar crack on me. However, it was only a small crack, not crucial to the stability or structure, so I continued rather than cursed/called the company.

Saturday, March 19, 2016

THE PLOT 5

Spring has arrived in month, and just in season. The weather is stiller, a little warmer, and sunnier. Well - for a few days... I planted the last of my first early potatoes - Casablanca - the second weekend of the month, despite having a hacky-cough. Behind them is my broad bean and garlic patch, doing well...


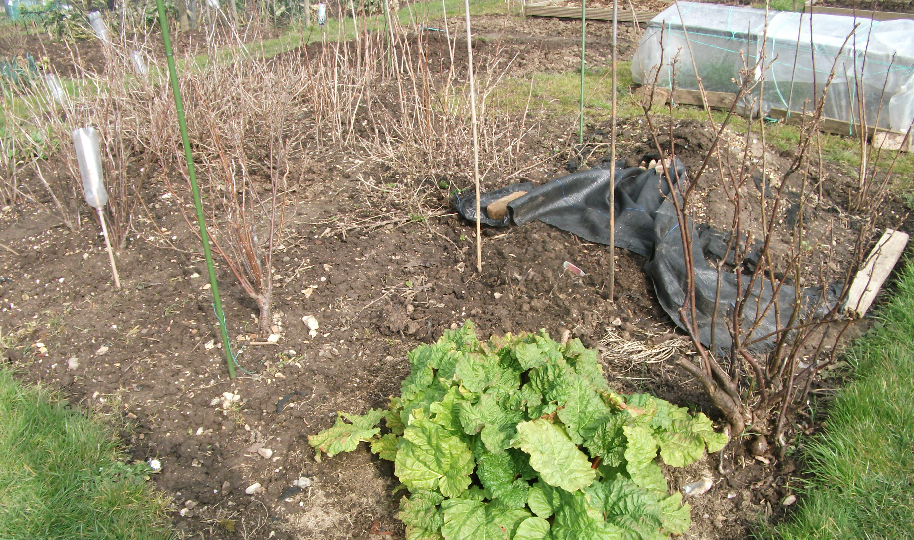
I shall be planting my main crop and salad spuds shortly. My fruit area is going well also - I have hoed the weeds, the rhubarb and blackcurrants are shooting and gooseberry bushes are fed, mulched and pruned. The raspberry canes are beginning to bud, also. The green posts are ready to hang net from when the fruits arrive.


The next photo shows my artichoke and onion patch - all planted up. I need to do the edges, though. Some of the onions are already shooting. Behind that is my cold frame, which I may not bother with next year as it is too much trouble fastening it down in winds. I also have the poly tunnel and patio greenhouse at home now. This is filled with broad beans, garlic and a pair of lemongrasses.


My final shot for today shows my three raised beds and the area where my excess onions were planted next to the two blackcurrant bushes. The one closest is filled with straw laden horse muck and the runners/new plants. The next one back is empty of fruit and will contain flowers, melon and squash. The one furthest back has the old strawberry plants in.

You can also view my weed bin - which shall soon be emptied out and a new bag replace the old to be filled only with weeds - not the plastic muck the former plotster left in the weed bag.

Saturday, March 12, 2016

SPRING CLEANING 36


I filled the new bathroom cabinet and was happy to find slots for everything - including the items that had formerly been situated on top of the old closet. I was very happy to have a shiny new-looking bathroom cabinet - despite the ugly room it was shining out into. There is much work to be done in there - and not just the sweeping of the floor under the work! I think you will agree though, that the before and after shot shows a great improvement.


Winter was over. Spring arrived with March 2016. I had already begun my spring cleaning by thoroughly going over the lower hallway, but my first non-regular task of the new season was to wash the spare room floor. I had picked up a new mop head, so after my initial water/broom scrub, was able to mop it over.


You can see that I no longer have a room filled to the brim of stuff to get rid of - just a recliner, a back rest, and few boxes and bags along with the painting stuff. Another task that should soon be completed is the former fireplace.


I aim to cover the boarded up piece with burgundy foil to match the curtains - after fixing the board more firmly. Before that task could be started, I caught a cold. This put me out for around a week as I was conserving my energy for work and essential cleaning. As it became a hacking cough, I began to get up straight with the cleaning, ready to bounce into spring cleaning mode and DIY mode after - but whilst snort-splutter-awhooshooing, I did tackle one simple job - the shower curtain.


The old shower curtain had been up for 3-4 years and was getting grimy at the base. I had a voucher for bathroom accessories, so decided to splash out on a new shower curtain!

Thursday, March 3, 2016

WINTER WONDERS 41


Despite careful measuring, from corners of cabinet exterior, in relation to the other 3, and from the wall to one side, once drilled, the screw sites were not entirely accurate. However, I began with the upper holes and continued to the lower pair.


All seemed to go well at this stage and so I inserted the wall plugs - or tried to. The lower righthand corner one did not go in properly, and I had to drill the hole deeper. I also had to hammer them in gently...


I then had the task of balancing the hefty cabinet in one hand while inserting screws with the other. I managed - just. I fixed one screw in position and wound it in a little way by hand, then screwdriver, before inserting the other top screw and doing likewise. I then screwed these in about halfway, or a little further before doing likewise with the bottom two.

I did encounter a small problem or two - but once all four had been screwed in as far as was possible, the closet held firm and secure to the wall when nudged. The first problem was the upper righthand screw being at an angle and the second being the lower righthand screw not meeting the wallplug at all, but it fixed itself into the wall anyways.


The cabinet was up - and felt secure! It was then time for me to hop off to the funeral of a neighbor...

Sunday, February 28, 2016

WINTER WONDERS 40


Firstly, I had to remove the cabinet and mirror from the wall where they have lived for between 2 and 4 decades. This task was done one Friday morning prior to taking an elderly friend for a walk. The mirror was easy, with a couple of twists of my screwdriver it fell off. The cabinet required the attention of a screwdriver and chisel, though, as there were two small screws and one huge one securing it to the bathroom wall.


You can see that I was successful in removing both items eventually, and also the amount of dirt that had accumulated behind them - ew. My next task therefore, was to clean the wall over using baby wipes, paper towels soaked in vinegar, and finally a cheap cleaning cloth. I let it dry while taking my friend for her walk...


Those mucky-yukkys are now outside the house awaiting a tip trip - along with a broken lawn mower and several bags of plastic infested weed-roots. In the above picture you can see the turquoise coloring our bathroom used to be when I grew up...along with the planned repaint that occurred after I had left the house to live in Australia for 22 years.


I got back from my short trip out and prepared to secure the new bathroom cabinet to the wall. The drill was ready, as were the cabinet, wall plugs, screws...


...everything except for an extension lead for the drill. I measured it out, and discovered that using my computer surge protection bar lead would just reach from the upper hallway plugs to the bathroom with the drill added, so began the next task - marking where to drill.


I measured the cabinet, sited it in my mind on the wall, marked its external corners, then where I figured the screws would insert...